⭐⭐⭐⭐⭐930+ Happy Customer Reviews

Sprinkler Solenoid Replacement

Sprinkler Solenoid Replacement: Signs, Test & Fix (2026)

sprinkler-spray

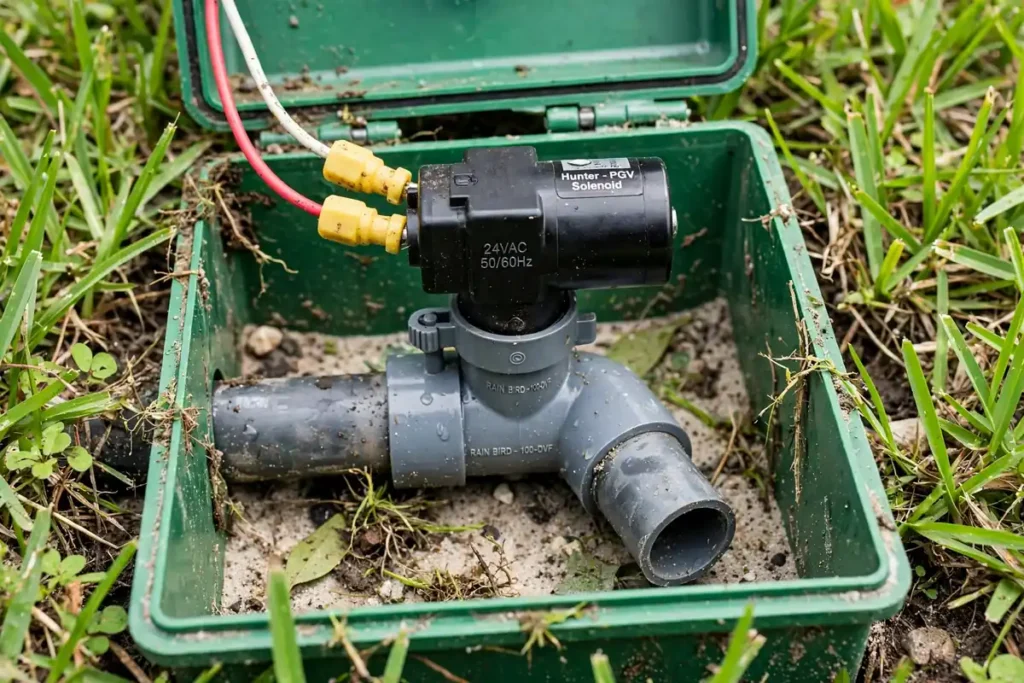
A dead zone is very often a $15 part. The solenoid — the small cylinder screwed onto your zone valve — is what turns your controller’s 24-volt signal into an open valve. When it fails, the zone won’t start, won’t stop, or works when it feels like it. The good news: replacing one takes about 10 minutes and no plumbing. The catch: solenoids get blamed for a lot of problems they didn’t cause. Here’s how to prove it’s the solenoid, replace it correctly, and know what to check when a new one doesn’t fix it.

Start With the Test That Splits the Problem in Half

Every valve problem is either electrical (solenoid, wiring, controller) or mechanical (diaphragm, debris, valve body). One test tells you which side you’re on: open the valve box, find the dead zone’s valve, and turn the solenoid itself a quarter-turn counterclockwise (or open the small bleed screw beside it).


If the zone springs to life manually, the valve’s mechanics are fine — your problem is electrical, and the solenoid is suspect #1. If nothing happens even manually, stop: it’s mechanical, and a new solenoid won’t help. The solenoid’s place in the system is covered in our guide to irrigation system components if you want the full picture first.

5 Signs the Solenoid Has Actually Failed

Once the bleed test points to the electrical side, these are the failure signatures that specifically indict the solenoid:

What Failure Looks (and Sounds) Like

Healthy solenoids click. Dying ones do the following instead.

1. Silence at the Valve

Stand at the valve box while someone starts the zone from the controller (or use the controller’s manual test and hurry). A working solenoid makes a distinct click as the plunger lifts. No click at all — with the station running — means the coil isn’t pulling. Combined with a passed bleed test, that’s the single most reliable sign the solenoid is done.

2. It Runs by Hand but Never From the Controller

The zone waters perfectly when you open it manually at the valve, yet the controller can’t start it. The water path is proven good; only the electrical trigger is missing. Nine times out of ten that’s a dead coil — the tenth is a cut wire, which the multimeter test below separates in a minute.

3. Buzzing, Chattering, or Too Hot to Touch

A solenoid that buzzes loudly, chatters, or feels hot after a few minutes of runtime has a coil that’s shorting or a plunger that’s binding. Warm is normal; hot is a failure in progress. A buzzing solenoid may still open the valve today and quit entirely next week — replace it while it’s a choice, not an emergency.

4. Cracked Housing or Green, Corroded Wires

Florida valve boxes are hostile places: standing water, heat, and ants. A coil housing that’s cracked, wires with green corrosion at the splice, or a connector that’s crumbled all break the circuit as surely as a burned coil. If your valve box regularly looks like the ones in our valve box full of water guide, electrical parts live short lives in it.

5. Works Cold, Quits Hot

The zone starts fine in the early morning, then fails on afternoon cycles — or dies mid-run. Heat expands the coil windings; a coil with an internal crack opens the circuit only when warm. It’s the most misdiagnosed sign (it looks like a pressure problem), and it’s a textbook solenoid replacement case.

Solenoid Replacement Cost: DIY vs Pro

OptionTypical CostNotes
Replacement solenoid (part only)$10–$25Rain Bird, Hunter, Toro — match your valve’s brand & model
Waterproof wire connectors (pair)$1–$10Grease-filled, direct-burial rated — never skip these
Pro replacement (part + labor)$85–$175Mostly the service call — the swap itself is minutes
Full valve replacement (if the body is cracked)$150–$300Cutting & re-plumbing the whole valve — a different job

Typical 2026 prices for the Palm Coast / Flagler County area. The part is cheap; what you’re paying a pro for is the diagnosis — which this guide just gave you free.

Get the Right Solenoid: The Compatibility Trap

Most residential solenoids run on 24 VAC from a plug-in controller, and within a brand they’re broadly interchangeable across valve models. Two traps catch people. First: DC latching solenoids — used with battery-operated controllers — look nearly identical but work completely differently (they pulse instead of holding).


A latching solenoid on a standard controller (or vice versa) simply won’t work, and it’s the #1 reason a “new solenoid” appears dead out of the box. Second: thread and plunger specs vary by brand — a Hunter solenoid in a Rain Bird valve may screw in yet seal poorly. The foolproof move: unscrew the old solenoid and take it with you, or order by the valve’s exact model number stamped on the valve body.

solenoid replacement

The Replacement, Step by Step (About 10 Minutes)

Step 1 — Power and water off. Unplug the controller (or switch it off) and shut off the irrigation water — the shutoff is usually at your backflow preventer. Ten seconds here prevents both shocks and geysers.


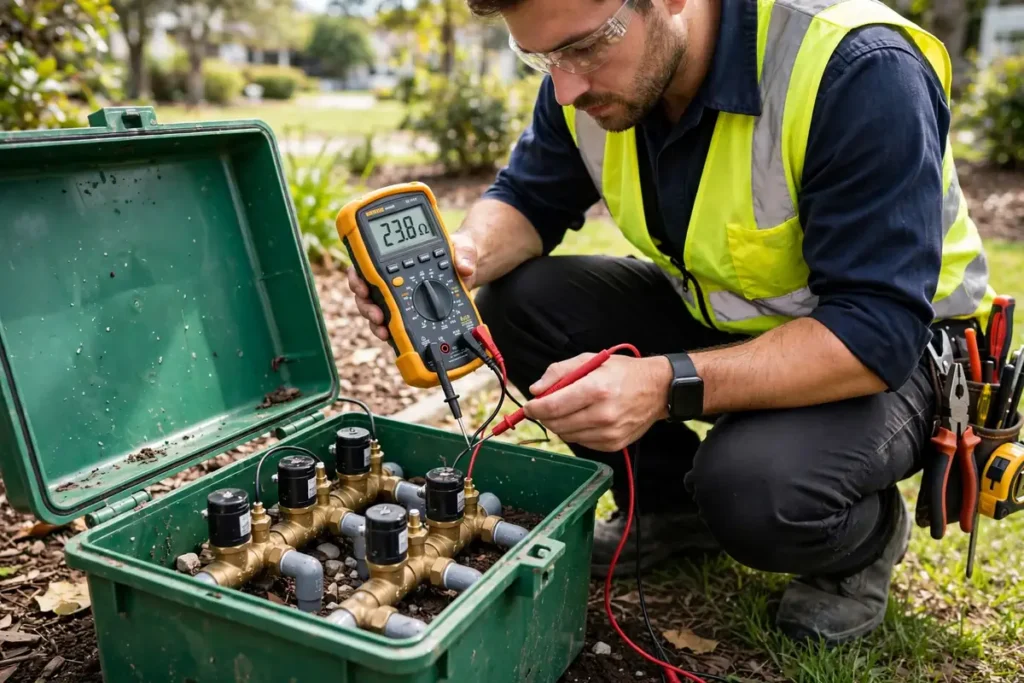
Step 2 — Confirm with a meter, if you have one. Disconnect one solenoid wire and measure resistance across the two coil leads. A healthy coil reads 20–60 ohms. Open/infinite or near-zero means the coil is dead — proceed with confidence.


Step 3 — Photograph the wiring. One solenoid wire goes to the common wire, the other to the zone wire. On 24 VAC it doesn’t matter which is which — but a photo makes reconnection foolproof.


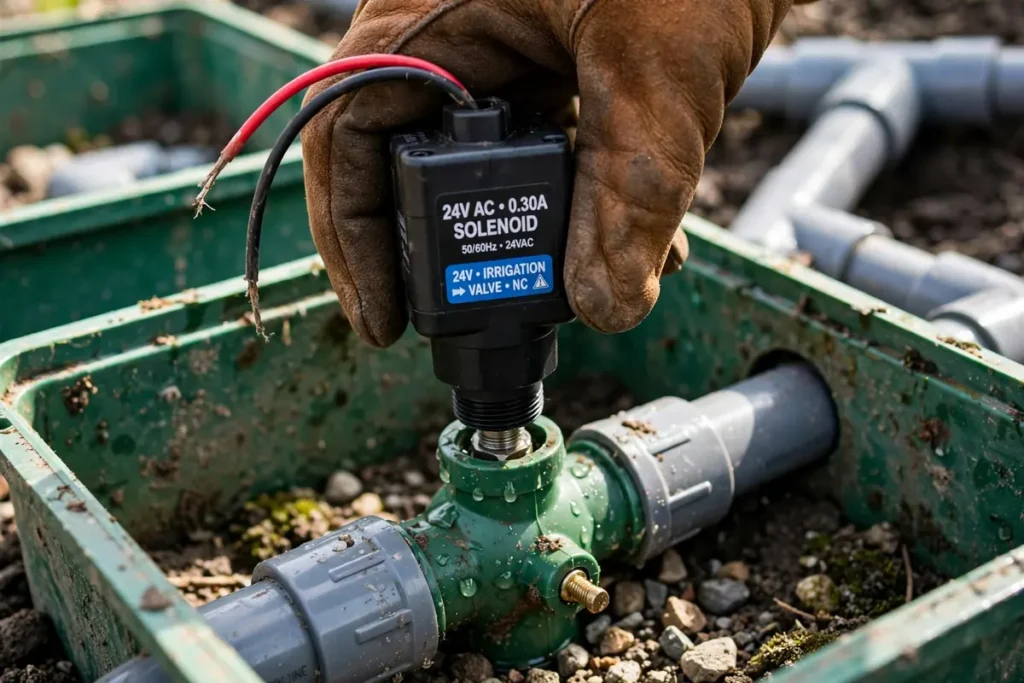
Step 4 — Unscrew the old solenoid. Turn it counterclockwise by hand (pliers only if it’s seized, and gently). It lifts straight out. Check the small plunger and O-ring seat for grit and rinse the port if it’s sandy.


Step 5 — Install the new one. Screw it in hand-tight, then a quarter-turn more — no heroics; over-tightening cracks housings and is a top cause of repeat failure.


Step 6 — Reconnect with waterproof connectors. Twist each pair together inside grease-filled direct-burial connectors. Ordinary wire nuts in a wet valve box are a failure scheduled for next season.


Step 7 — Test in order. Water back on slowly. Open the new solenoid manually (quarter-turn) to confirm the zone runs. Close it, power the controller, and start the zone from the timer. It should click, run, and shut off cleanly when the station ends.

New Solenoid, Still Broken? The 3 Other Suspects

The Diaphragm (Mechanical After All)

If the zone now clicks but still won’t open — or won’t fully close — the diaphragm inside the valve is torn, warped, or grit-scored. That’s a bonnet-off repair: 4–6 screws, a $8–$20 diaphragm, and careful reseating. Zones that dribble constantly or weep at the bonnet seam are telling you the same story.

The Wiring Run (Florida's Favorite Failure)

Multiple dead zones, or a solenoid that tests good but never sees voltage, points underground: a nicked wire from edging, a corroded splice in a flooded box, or ants nesting in warm connections. A multimeter at the valve wires while the station runs settles it — no ~24 VAC means the signal never arrived, and no solenoid will fix that.

The Controller Station Itself

Swap test: move the dead zone’s wire to a station that works. If the zone now runs, the controller’s original station output is dead — a controller problem, not a valve problem. This two-minute test has saved more homeowners an unnecessary valve replacement than any other; it’s also how pros size up systems like the multi-zone layouts in our irrigation zones guide.

Make the New Solenoid Last Longer Than the Old One

Solenoids typically last 5–10 years; Florida conditions shorten that when you let them. Three habits stretch it: always use grease-filled waterproof connectors (corrosion at the splice kills more solenoids than coil burnout); keep the valve box from becoming a pond — clear debris and standing water so electrical parts aren’t bathing (a chronically flooded box can also mean a hidden leak, which our leak detection guide helps trace); and consider a surge protector on the controller, because Florida lightning sends spikes down low-voltage wire runs that cook coils silently. Finally, resist over-tightening at install — cracked housings let water in, and water always wins.

DIY or Call a Pro? An Honest Split

This is one of the most DIY-friendly repairs in all of irrigation: no digging, no plumbing, no glue — if you can change a light bulb you can change a solenoid. Do it yourself when the bleed test and meter point at the coil. Call a pro when: you can’t find the valve box at all, several zones died at once (that’s wiring/controller territory), the valve body itself is cracked and the whole valve needs cutting out, or the box is a flooded, corroded mess you’d rather not learn electrical diagnosis in. A pro visit at $85–$175 buys the diagnosis as much as the part — now you know how to tell whether you need it.

Zone Still Dead After the DIY Checks? We'll Find It Fast

A solenoid swap fixes a lot of dead zones — but when the problem is buried wiring, a tired diaphragm, or a controller station, guessing gets expensive fast. We diagnose the actual cause before replacing anything.

Call (386) 237-2983 — irrigation repair across Palm Coast and Flagler County: solenoid and valve replacement, wiring faults, controller problems, and full system troubleshooting. Free estimates, honest diagnosis first.

Frequently Asked Questions

How do I know if my sprinkler solenoid is bad?

Do the bleed test first: open the valve manually at the solenoid. If the zone runs by hand but not from the controller, and you hear no click when the station starts, the solenoid is the prime suspect. A multimeter confirms it — disconnect one wire and measure the coil: 20–60 ohms is healthy; an open (infinite) or near-zero reading means it’s dead.

How much does it cost to replace an irrigation solenoid?

The part costs $10–$25 (Rain Bird, Hunter, Toro) plus a few dollars for waterproof connectors, so a DIY replacement is under $35 total. Hiring a pro typically runs $85–$175 in the Palm Coast area — mostly the service call, since the swap itself takes about 10 minutes.

Are all sprinkler solenoids interchangeable?

No. Most plug-in-controller solenoids are 24 VAC, but battery-operated controllers use DC latching solenoids that look similar and work differently — they are not compatible. Thread and plunger design also vary by brand, so match the replacement to your valve’s brand and model number.

Can I replace a solenoid without turning off the water?

No. Always shut off the irrigation water (usually at the backflow preventer) and the controller power first. Removing a solenoid under pressure can blow the plunger out and flood the valve box — and the electrical side should never be handled live.

How long do irrigation solenoids last?

Typically 5–10 years. Lifespan drops in valve boxes that flood regularly (corroded splices), in systems without surge protection in lightning-prone areas like Florida, and when solenoids are over-tightened at installation and their housings crack.

Why doesn't my zone work even with a new solenoid?

The three usual reasons: the diaphragm inside the valve is torn or dirty (mechanical failure), the underground wiring or a splice is damaged so voltage never reaches the valve, or the controller’s station output is dead. The wire-swap test at the controller and a voltage check at the valve wires isolate which one in minutes.

Facebook
X
WhatsApp