⭐⭐⭐⭐⭐930+ Happy Customer Reviews

How to Install a Drip Irrigation System: A Step-by-Step Guide

A drip irrigation system waters plants at the root instead of spraying water across an entire bed. If you’ve been searching for how to install a drip irrigation system for flower beds, vegetable gardens, or shrubs, the process is more approachable than it looks — most residential setups connect straight to an outdoor hose faucet and don’t require trenching or plumbing experience. This guide covers the full installation process, the parts you’ll need, and what homeowners in our service area should know about local watering rules before starting.

What Is a Drip Irrigation System?

A drip irrigation system uses tubing and small emitters to release water slowly, directly at the base of each plant. Instead of spraying water through the air, where wind and Florida heat can evaporate a good share of it before it reaches the soil, drip lines put water exactly where the roots are. That precision is why drip systems typically use less water than a sprinkler zone covering the same square footage.

Why Homeowners in Our Service Area Are Switching to Drip

Two things are pushing homeowners toward drip irrigation right now: rising water costs and tighter watering schedules.

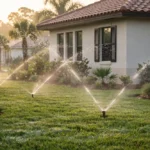
SJRWMD’s Phase III Extreme Water Shortage Order currently limits standard sprinkler zones to one watering day per week across Flagler and St. Johns counties, with an 8 a.m. to 6 p.m. blackout window on that day. Drip and micro-irrigation lines are exempt from that restriction in both counties, so a drip zone can run any day, at any time, without violating the order. Volusia County follows its own separate watering ordinance instead of the SJRWMD schedule, so check with the county directly before assuming the same exemption applies there.

Beyond the regulatory angle, drip irrigation cuts down on weeds since only the root zone gets wet, reduces fungal problems on leaves and stems, and handles oddly shaped beds better than a sprinkler head ever will.

Tools and Materials You’ll Need

  • 1/2″ polyethylene mainline tubing
  • 1/4″ distribution tubing for individual plants
  • Backflow preventer
  • Pressure regulator (most drip systems run at 20–30 PSI)
  • In-line filter (150–200 mesh)
  • Drip emitters or micro-sprayers (0.5, 1, or 2 GPH, depending on plant size)
  • Hole punch tool
  • Tubing stakes
  • Goof plugs, for capping unused punch holes
  • End caps or figure-8 line closures
  • Hose-end timer (optional, for automatic scheduling)

A basic drip conversion kit bundles most of these parts and takes the guesswork out of sizing if this is your first system.

How to Install a Drip Irrigation System, Step by Step

Six steps take a basic drip system from parts on the counter to water running in the ground. Follow them in order — most drip system failures trace back to skipping one.

Step 1: Map Out Your Zones

Sketch the garden bed or planting area and mark every plant that needs water. Group plants with similar water needs into the same zone — a vegetable bed and a row of mature shrubs shouldn’t share a line, since their watering needs differ. Note the distance from the hose faucet to the farthest plant; this determines how much tubing you’ll need.

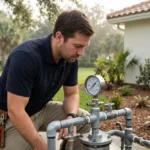
Step 2: Install the Backflow Preventer, Pressure Regulator, and Filter

Connect these three components directly to the outdoor faucet, in this order: backflow preventer first, to keep irrigation water from siphoning back into the drinking water, then the pressure regulator, then the filter. Skipping the pressure regulator is one of the most common reasons drip systems fail early — full hose-bib pressure will blow emitters apart.

Step 3: Run the Mainline Tubing

Lay 1/2″ mainline tubing from the faucet assembly to the garden bed, following the path sketched in Step 1. Keep any single mainline run under 200 feet — longer runs lose enough pressure that emitters at the far end won’t deliver consistent flow. Stake the tubing down every few feet so it doesn’t shift.

Step 4: Add Distribution Lines and Emitters

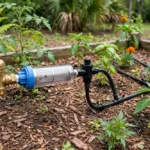
Punch a hole in the mainline at each plant location with the hole punch tool, insert a barbed connector, and run 1/4″ distribution tubing to the plant. Attach an emitter sized to the plant — a small emitter for annuals, a higher-flow emitter or micro-sprayer for shrubs and trees. Cap any unused punch holes with a goof plug so they don’t leak.

Step 5: Flush, Cap, and Pressure-Test the System

Before installing the final emitters, run water through the open mainline to flush out debris. Cap the end of the line, turn the water on, and walk the full length of the system checking every connection for leaks. Confirm each emitter is dripping steadily before calling it done.

Step 6: Add a Timer for Automatic Watering

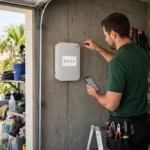
A hose-end timer turns a new drip system into a hands-off, automatic setup. Set it to run early in the morning, before Florida’s heat and humidity peak, so water soaks in rather than evaporating.

Common Drip Irrigation Installation Mistakes to Avoid

  • No pressure regulator — standard hose-bib pressure (40–60 PSI) will pop emitters rated for 20–30 PSI
  • Skipping the filter — Florida water carries enough sediment to clog emitters within a season without one
  • Mainline runs over 200 feet — pressure drops too far by the end of the line, underwatering distant plants
  • Using drip on turf — drip irrigation is built for beds, containers, and individual plants, not for watering lawn grass
  • Not flushing the line before capping it — trapped debris ends up lodged in the first few emitters

Any one of these can shorten a system’s life. Catching them during installation is easier than diagnosing a mystery leak six months later.

DIY Drip Kits vs. a Professionally Installed Zone

The steps above cover a surface drip kit for garden beds, containers, and foundation plantings — a project most homeowners can finish in an afternoon. A permanent drip zone tied into an existing irrigation controller, running alongside a lawn’s sprinkler lines, is a different job. It involves cutting into an existing valve system, matching flow rates to the controller’s zone capacity, and often burying and capping lines to code — work worth handing to a licensed irrigation installation contractor rather than tackling with a weekend kit.

Talk to a Palm Coast Irrigation Specialist

Irrigation is all we do — no mowing, no pest control, no landscape crews spreading attention across other jobs. That focus is why we can walk a property, tell you honestly whether spray, drip, or a mix fits your garden, and handle the installation without guesswork.


If a system already in the ground isn’t keeping up, our repair team can look at what’s there before you add anything new, and our maintenance plans keep a new drip zone running the way it was designed to once it’s in the ground.

Frequently Asked Questions

Is drip irrigation exempt from Florida’s watering restrictions?

In counties under the SJRWMD Phase III order, drip and micro-irrigation lines are generally exempt from the one-day-per-week sprinkler schedule. The exact rule can vary by county, so confirm current restrictions with your local water management district or county government before relying on the exemption.

How much does it cost to install a drip irrigation system?

A basic garden-bed kit costs far less than a professionally installed, controller-connected zone, and both scale with the size of the area, plant count, and tubing length involved. For a property-wide system, request a quote based on the actual layout rather than a flat estimate.
Do I need a permit to install drip irrigation in Florida?

A small DIY kit connected to an existing outdoor hose faucet typically doesn’t require one. Tying drip zones into a main irrigation system or altering backflow prevention equipment may require a permit, depending on the local building department — check before you dig.

Can I connect drip irrigation to my existing sprinkler system?

Yes. Drip conversion kits let you swap a spray head on an existing zone for a drip manifold, so that zone waters beds instead of spraying turf. This works best once a professional confirms the zone’s flow rate can support the conversion.

How long and how often should a drip irrigation system run?

Most residential drip zones run 30 to 60 minutes, two to three times a week, depending on soil type, plant maturity, and season. Sandy Florida soil drains fast and often needs more frequent, shorter cycles rather than one long soak.

Facebook
X
WhatsApp