⭐⭐⭐⭐⭐930+ Happy Customer Reviews
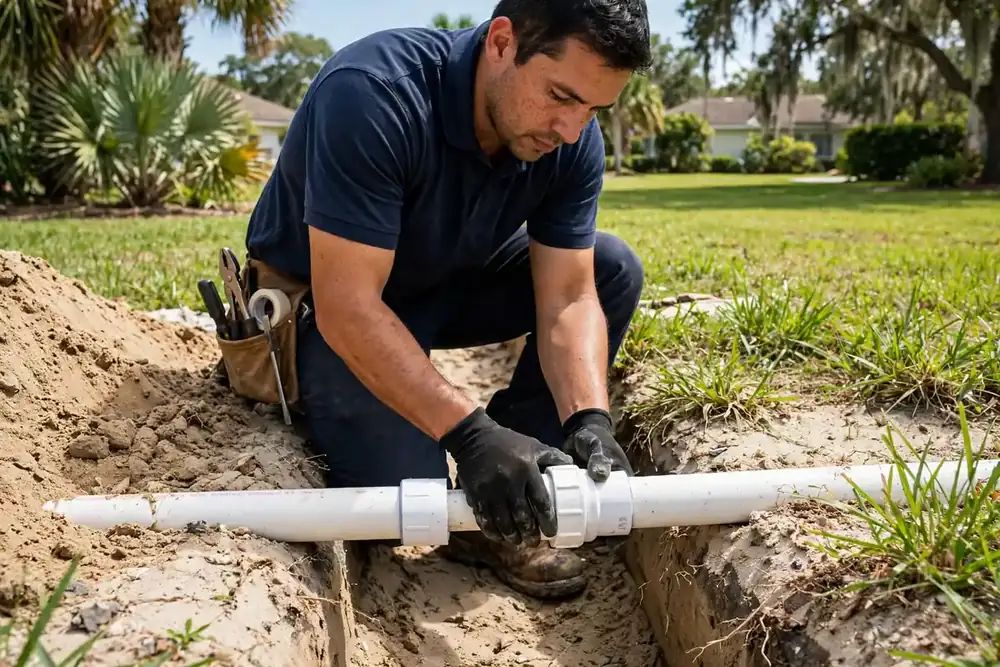
To fix a broken sprinkler pipe, shut off the water, dig around the break, cut out the damaged section, and join the ends with a slip or repair coupling using primer and PVC cement. Let it cure, flush the line, then test before backfilling.
Key takeaways:
That one question decides how careful you have to be. A lateral line only holds pressure while its zone runs, so shutting off that zone is usually enough to work safely. The mainline is different: it stays pressurized all the time, straight from the water supply to the valves, so it must be shut off at the main valve before you cut anything. Cut a pressurized mainline and you get a geyser, a flooded trench, and a repair that is suddenly much harder to make.
If you are not sure which line you have found, follow it. A line that runs from the backflow preventer or meter toward the valve boxes is the mainline; a line that runs from a valve box out to the heads is a lateral. Our irrigation system components guide shows where each part sits in a typical system. When in doubt, shut off the main valve anyway — it costs a minute and removes the risk entirely.
You need a shovel, a hacksaw or PVC pipe cutter, a tape measure, a marker, clean rags, purple primer, PVC cement, and the right coupling for your pipe. For poly pipe, add barbed couplings and stainless clamps instead of primer and cement. Keep a bucket and a towel nearby: even a drained line holds water in its low spots, and a dry pipe end is essential for a glued joint.
Buy the coupling before you dig: measure or photograph the pipe first — diameter and material (white PVC or black poly) — so you are not guessing at the parts counter.
Most failed repairs fail at this choice, not at the gluing. Use the break itself to decide.
| What you find | Use this fitting | Why |
|---|---|---|
| Small crack, pipe ends still meet | Slip coupling | Slides over both ends and bridges a short damaged section |
| Clean break, but you cannot spread the pipe apart | Telescoping (slip-fix) repair coupling | Extends to meet both ends without flexing the buried line |
| Gap too big for one coupling | Two couplings plus a new pipe section | Cut back to sound pipe on both sides and rebuild the span |
| Black poly pipe | Barbed couplings and clamps | Poly pipe is not glued; barbs and clamps make the seal |
| Broken head riser | Swing pipe and a new fitting | Replaces the riser without disturbing the lateral |
Cut back to sound pipe on both sides: gluing to cracked or crushed pipe just moves the next break a few inches down the line.
Shut off the main valve for a mainline break, or the zone valve for a lateral break, then run the zone briefly to confirm the water has stopped. The break is usually where the ground is wettest, softest, or sinking — or where a head sprays weakly while its neighbours run fine. If you have not found the break yet, our sprinkler system leak detection guide walks through the meter test and the search in order.
Before you cut, drain the line so the pipe ends are dry for gluing. Our how to drain an irrigation system guide covers the drain points to use. Wet pipe is the most common reason a glued joint fails: cement will not bond properly to a wet surface, no matter how carefully you apply it.
Dig wide rather than deep, and give yourself room to work on both sides of the break — at least a foot of clear pipe on each side. In Palm Coast’s sandy soil, a narrow hole caves in as fast as you dig it, so slope the sides and keep the spoil back from the edge.
Before you dig, call 811 so buried utilities are marked, and check how deep the line should sit. Our how deep sprinkler lines need to be guide covers the statewide minimums and the 811 process. In Palm Coast specifically, according to the City’s building handouts, mainlines call for at least 18 inches of cover and laterals 12 inches — deeper than the statewide minimums — so expect to dig deeper than generic guides suggest, and restore that cover when you backfill.
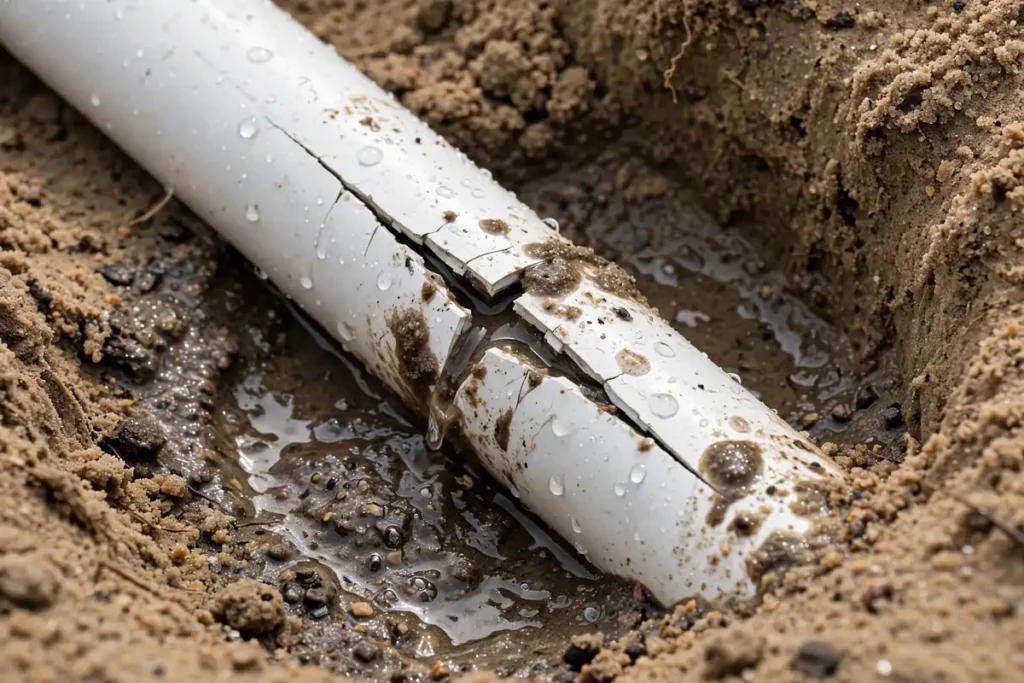
Mark both sides of the damage, then cut squarely with a hacksaw or PVC cutter — a crooked cut leaves a gap that weakens the joint. Cut back past any cracking or crushing until both ends are sound pipe, then deburr the inside edges so no shavings clog a head.
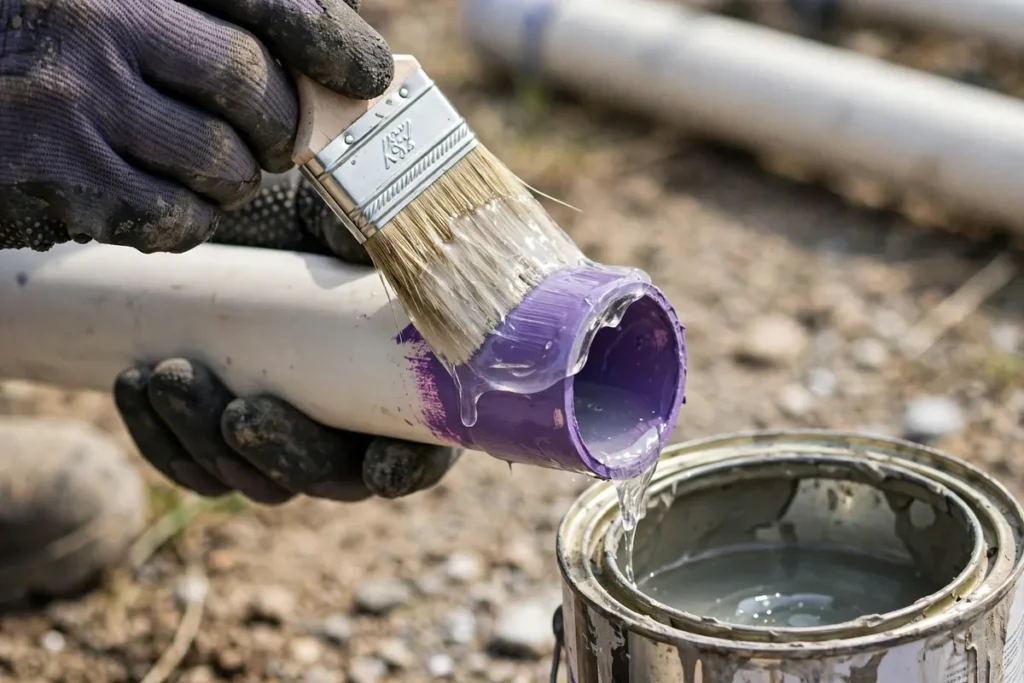
Dry-fit first to confirm span and alignment. Then brush purple primer onto pipe ends and coupling interior, follow immediately with PVC cement on both surfaces, push home, quarter-turn, and hold 30 seconds. Do not twist after that hold — movement while cement sets breaks the bond.
Cure time depends on pipe size and weather: allow 15 minutes for 1/2 to 1-1/4 inch pipe and 30 minutes for 1-1/2 to 2 inch pipe at 60 to 100 degrees Fahrenheit and up to 160 PSI, plus at least 50 percent in humid weather. Always follow the chart on your cement can; when in doubt, wait longer.
Before the final test, flush the line through an open head downstream of the repair, so sand and shavings leave through the head instead of clogging nozzles.
Run the zone at full pressure and watch the joint for several minutes: a slow weep at minute three is still a failed joint, and far easier to fix with the trench open. Even head coverage means the line is clear.
Backfill in layers with clean sand, and keep rocks larger than 1 inch away from the pipe — a rock pressed against a buried line by settling soil is a future break. Tamp each layer lightly, restore the original cover depth, and water the patch in so the lawn settles evenly.
Poly pipe — the flexible black pipe used for many laterals — is not glued at all. Cut out the damaged section, push barbed couplings into both ends, and secure each with a stainless clamp tightened evenly. The barbs grip the inside of the pipe, so the cut must be square and the pipe must be pushed fully onto the barb; a half-seated barb is a blow-off waiting for the next pressure surge.
A broken head riser is a smaller job with the same logic: dig to the fitting, replace the riser on swing pipe — which flexes under a mower or foot instead of snapping — and replace a cracked fitting below it too, or the new riser leaks from the first run.
Four mistakes account for most repeat repairs. Skipping primer is the first: primer softens the pipe surface so the cement can weld to it, and a joint made with cement alone is a joint waiting to separate. Gluing wet pipe is the second — dry the ends, even if that means waiting for the trench to drain. Backfilling too soon is the third: an uncured joint under soil load shifts, and a shifted joint leaks. Rocks in the backfill are the fourth: one sharp rock against the pipe, pressed down by a season of settling, cuts through eventually.
The fix for all four is the same habit: slow down at the joint.
Some breaks are not homeowner jobs, and knowing the line saves money rather than costing it. Call a pro when the break sits under a driveway, patio, or slab, where cutting concrete and rerouting the line is involved. Call a pro for mainline work beyond a simple like-for-like coupling, for rerouting or adding new lines, and for a break that keeps returning in the same run — repeat breaks usually mean a deeper problem, such as pressure, root intrusion, or a failing run of pipe.
Tree roots deserve their own warning: a root that crushed a pipe will do it again unless the line is rerouted or protected — gluing the same pipe in the same spot is a repair with a built-in expiry date. For what a professional repair involves, see our sprinkler repair cost guide — this post deliberately carries no cost table of its own.
Run the zone, watch the joint, and flush before a single shovelful of soil goes back. A joint that holds with the trench open is a finished repair; one buried on hope is a callback.
One break is bad luck; two in the same run is information. Check zone pressure first, then roots, vehicle traffic over shallow pipe, and brittle pipe. If the same spot fails twice, investigate the run, not just the spot.
Our sprinkler system troubleshooting guide works through pressure, leak, and repeat-fault checks in symptom order, and it is the right next read when a single repair does not hold.
Sandy soil digs easily and collapses easily. Dig wider than you think you need, keep spoil well back from the edge, and work from one side so you are not on the lip that caves. Bed the repair in clean sand with no rocks over 1 inch near the pipe, and backfill in layers to its original depth.
Primer first, on both the pipe and the inside of the coupling, then cement on both surfaces while the primer is still wet — never cement on dry, unprimed pipe. Push the coupling home, quarter-turn, hold 30 seconds without twisting, then cure for the full time on the can: a joint made this way is welded, not just glued.
Run the zone at full pressure for several minutes and watch the joint itself, not just the heads. No weeping, no bubbling in the trench water, no soft ground forming around the repair.
Walk the zone and confirm even coverage. A head that mists, sputters, or stays down after a repair usually means debris from the cut reached it — flush again through an open head before you assume a second fault.
Backfill to the original depth, in clean sand, with no large rocks against the pipe. Shallow cover under a path or driveway is how the next break starts.
If the joint weeps after curing, the usual causes are a wet surface, a missed primer step, or a cut that was not square. There is no patch for a bad glued joint: cut it out and redo it properly. If a second attempt fails, the pipe itself — brittle, sun-damaged, or crushed — needs replacing, not another coupling.
Breaks under paving, mainline work beyond a like-for-like repair, rerouting, and repeat breaks are professional jobs — a licensed contractor can cut and restore hard surfaces, reroute properly, and diagnose the pressure or root problem behind a repeat failure.
We repair broken sprinkler pipes across Palm Coast, Flagler Beach, Ormond Beach, and Bunnell — like-for-like coupling repairs, mainline work, and reroutes when a run keeps failing. See our sprinkler repair service or call (386) 237-2983 for a repair visit. Irrigation & Sprinkler by DreamScapes has served the area since 2015, with 930+ customers, from 15 Hargrove Ln, Unit 5D, Palm Coast, FL 32137. We respond within 24–48 hours.
Yes, for a like-for-like repair on your own system: shut off the water, dig out the break, cut out the damaged section, and join the ends with the right coupling. Rerouting, new lines, and mainline work beyond a simple coupling belong to a licensed contractor.
Allow 15 minutes for 1/2 to 1-1/4 inch pipe and 30 minutes for 1-1/2 to 2 inch pipe at 60 to 100 degrees Fahrenheit and up to 160 PSI, and add at least 50 percent in humid weather. Always follow the chart on your cement can, and wait longer in Florida summer humidity.
A telescoping repair coupling that extends to meet both pipe ends when you cannot spread the buried pipe apart. It bridges a cut-out section without flexing the line, which is why it is the right choice for a clean break in a tight trench.
Yes for PVC pipe: purple primer softens the pipe surface so the cement can weld to it. A joint made with cement alone is much weaker and likely to separate. Poly pipe is different — it uses barbed couplings and clamps, not primer and cement.
That is a professional job. A break under paving usually needs the line rerouted or the surface cut and restored, and guessing at it from the edges risks a second break under the same slab. Call a licensed contractor rather than digging at the slab edge.
Repeat breaks in one run usually mean a deeper problem: overpressure, tree roots, vehicle traffic over shallow pipe, or a run of pipe gone brittle with age. Fix the cause — pressure, roots, cover, or the run itself — instead of coupling the same spot again.
Cut out the damaged section, push barbed couplings into both ends, and secure each with a stainless clamp tightened evenly. Poly pipe is never glued; the barbs grip the inside of the pipe, so the cut must be square and each barb fully seated.